


 – Scott Tominaga")
Introduction
Setting up React Native Push Notifications is one of the most frequently requested features when creating a mobile app. As a result, you must master this aspect of app development, Push notifications are a highly useful tool for any business, as is obvious.
By implementing and testing on both the iOS and Android platforms, we will be looking at how to set up push notifications in React Native in this blog.
Make sure you already have a React Native Project set up before moving forward with the implementation so that we can start carrying out the steps required to finish out our push notifications mission:
- Installation of Firebase
- Setup for Android
- iOS Setup
- Code integration for push notification
- Testing push notification
Let’s start this off now!
1. Firebase Installation
We start by adding the React native Firebase “app” module to the root of your React Native project using NPM or Yarn:
#Using npm
npm install –save @react-native-firebase/app
#Using Yarn
yarn add @react-native-firebase/app
Note: Any other Firebase services must first be installed before using the @react-native -firebase/app module.
Go to https://console.firebase.google.com and start a new project to create a Firebase app. Once the project has been created, we must add apps to the Firebase panel.
We will then list the required fields for both Android and iOS.
- The GoogleService.info.plist file will be added to the iOS native project in the case of ios.
- We will receive google-service.json for Android, which will be added to the Android native project.
2. Android Setup
We need to submit information about the Firebase app integration procedure, i.e. the Android Package name, to connect the Firebase service with the Android application.
Click the Android icon to start the Android app creation process when you arrive at the Firebase website.
We will download the google.service.json file that contains the Firebase configuration after we have added all the necessary information, and we will put it in the Android project at the following location:

To enable Firebase on Android to use the credentials, the google.service.plugin must be allowed on the project. This needs modifications to two files in the Android directory.
First, add google.service plugin as a dependency inside of /android/build.gradle file :

After that, run the plugin by including the subsequent code in your /android/app/build.gradle file.

3. iOS Setup
The iOS application and Firebase service will now be connected. To learn about the Firebase app integration procedure, including the iOS bundle id, you must click on the iOS icon on the Firebase platform.
We will obtain a GoogleService.Info.plist file that holds the Firebase configuration after providing the important information, and we will insert it into the iOS project’s root folder.
To enable Firebase to use the credentials on iOS, the Firebase iOS SDK must be arranged. Which you can do by opening your /ios/{projectName}/AppDelegate.mfile, and adding the following:
Import the Firebase SDK at the document’s top:
With your current method, add the following to the top of the method:
– (BOOL)application:(UIApplication *)application didFinishLaunchingWithOptions:(NSDictionary *)launchOptions {
// Add me — \/
if ([FIRApp defaultApp] == nil) {
[FIRApp configure];
}
// Add me — /\
// …
}
For iOS, we need to install pods:
cd ios/
Pod install
With iOS configurations, let’s proceed further to the code integration for received push notifications.
4. Code Integration For Push Notifications
The Firebase Cloud Messaging Service (FCM) is utilized to send push notifications. We will install this package on our project:

And for iOS, run this

To get push notifications on iOS, the app has to request permission for push notification, which you can achieve by running:

Real Android/iOS devices and Android emulators, may receive FCM messages. A message is just the payload of information we get with the notification.
Next, we must manage notifications in the following three app states:
- Active (the app is running in the foreground),
- Background (the app is minimized or running in the background),
- Killed (the app is closed or terminated)
The app can handle push notifications with just a small piece of code.
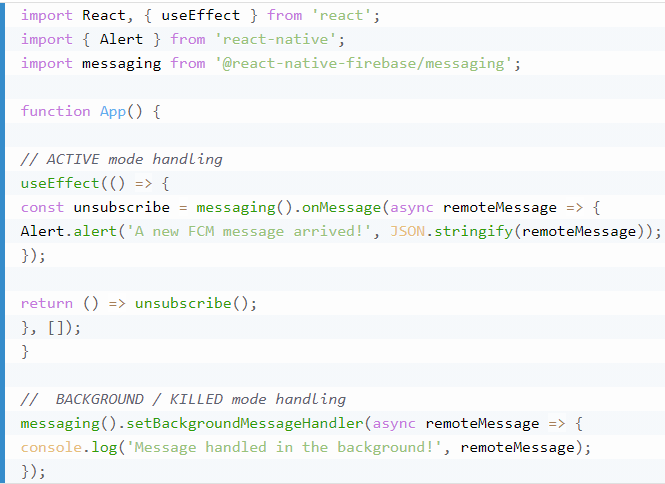
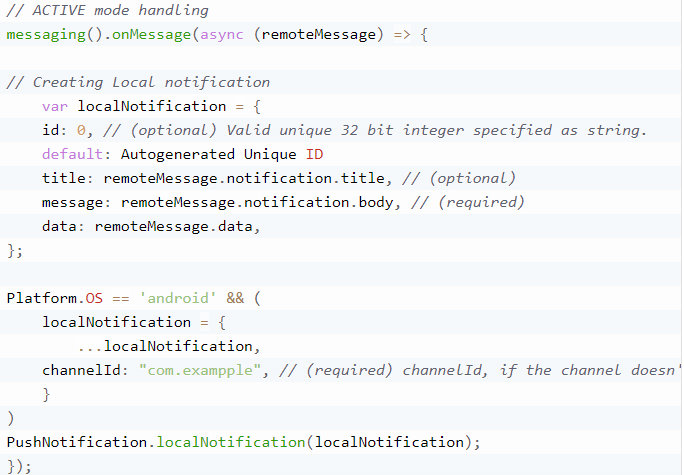
Notification Handling When The App Is Open
As the app will not show notifications in foreground mode, we normally get notifications in Firebase callback as shown above, then throw the local notification from the React Native app. We can create a local notification with this package.
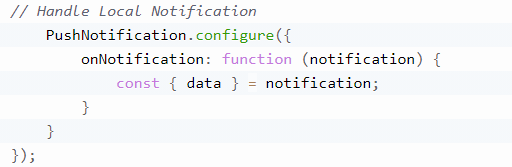
To detect clicks, add these lines of code:
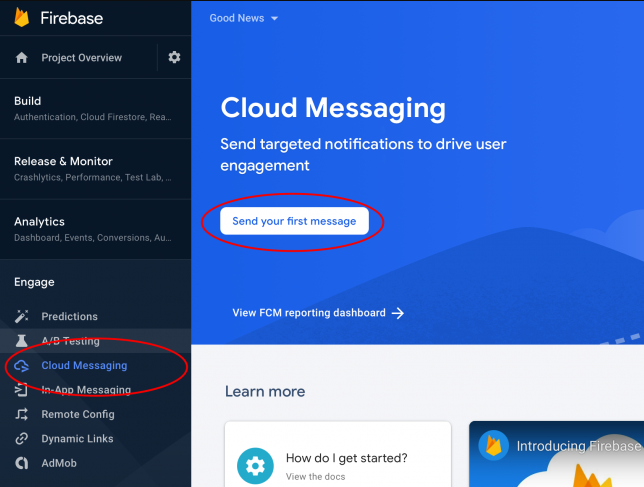
5. Testing The Push Notification
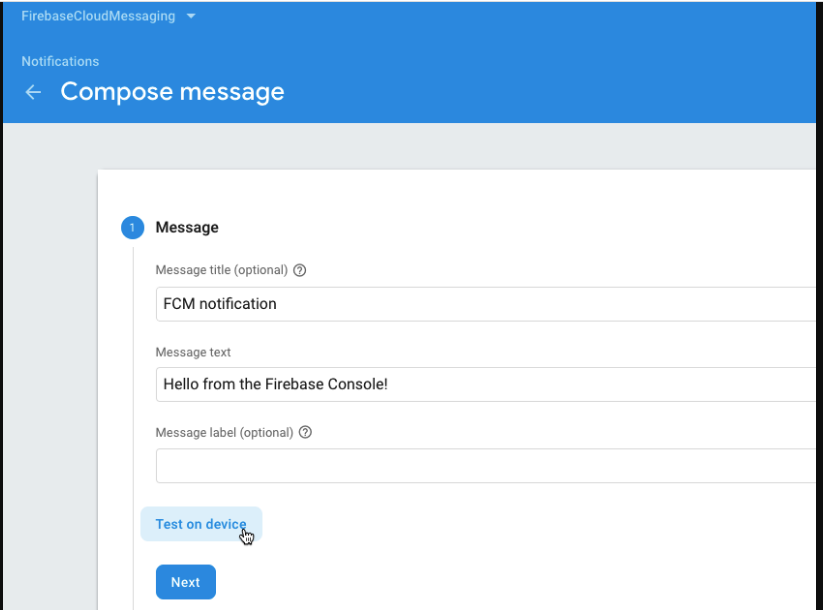
We may use the Firebase console to send react native push notifications. From the side menu, select the cloud messaging option, then click “Send your first message”.
After clicking the button, you will get to this screen where you can specify the title and body of the notification for testing. Click “Send test message” once the notification’s text has been entered.
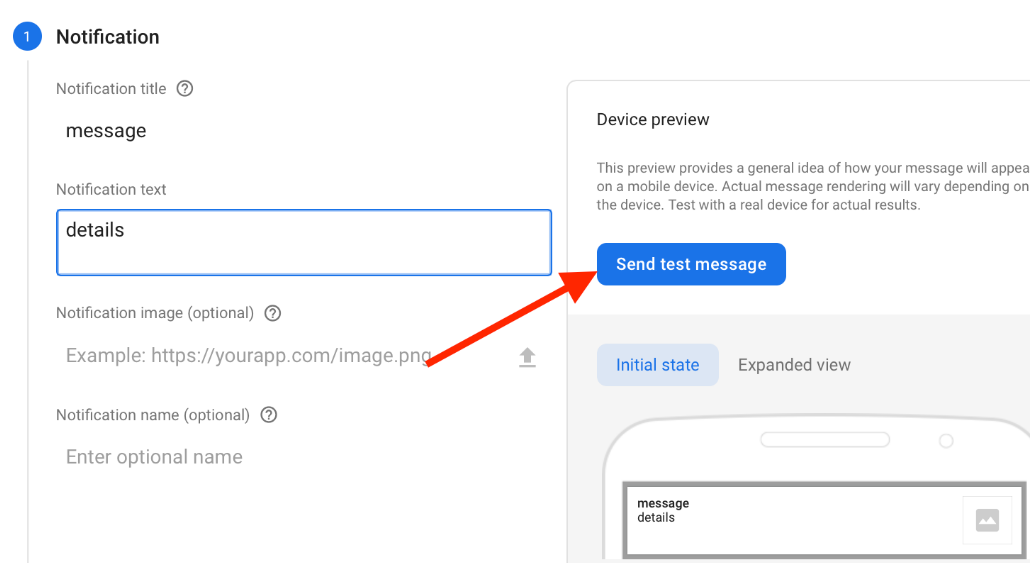
Now, specify the FCM token of the device, on which you want to send the notification.
Here, include the notification, and click on the Test button, then the push notification will be sent to the device with a particular device token.
fcmToken = await firebase.messaging().getToken();
console.log(‘fcm Token: ‘, fcmToken);
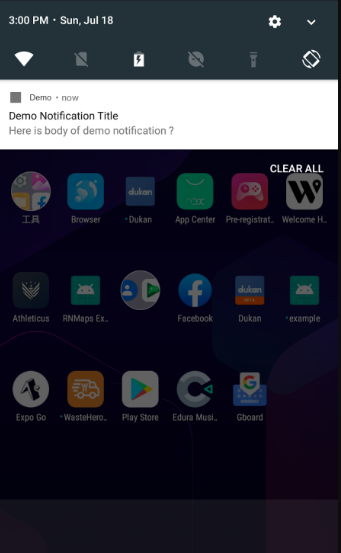
Then, all of sudden, our mobile gadget notified us.
Conclusion
That’s it! These are the steps by following you can integrate React Native push notifications into iOS and Android apps. However, if you want to create push notifications within a few minutes, you must visit WonderPush.


![Anso FG Reviews UPDATED 2024 [ansofg.com]](/wp-content/uploads/2023/12/Anso-FG-Reviews-UPDATED-2024-ansofg.com_-100x70.png "Anso FG Reviews: UPDATED 2024 [ansofg.com]")


